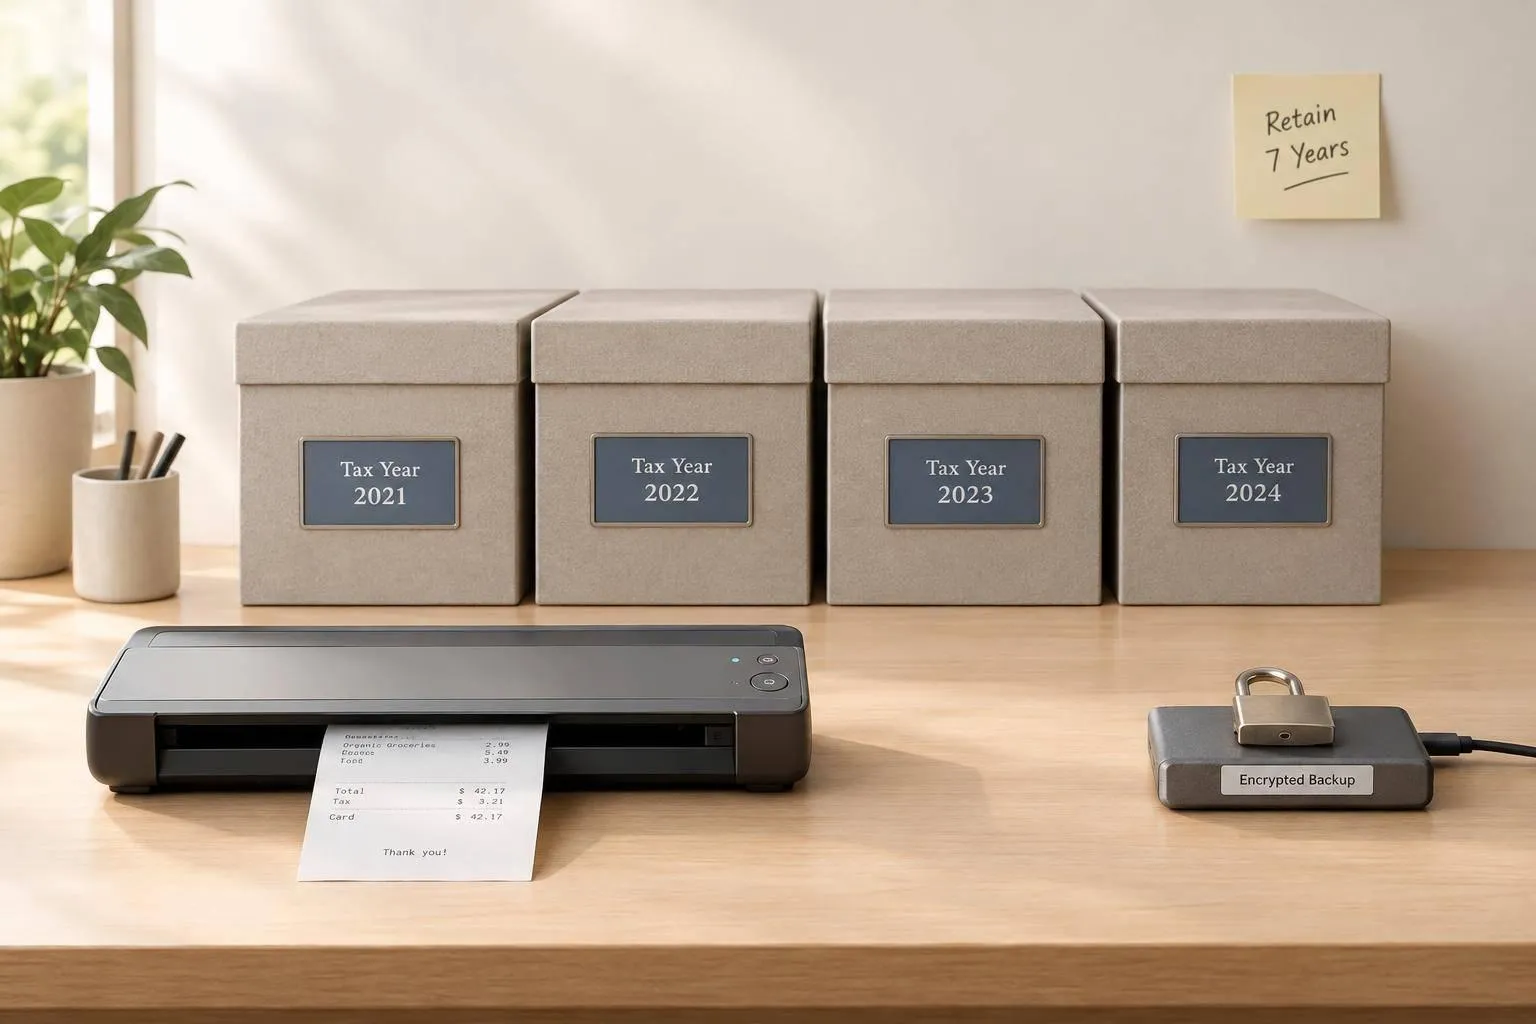
I keep donation receipts by tax year, with proof of the gift - not just the receipt. For each gift of $250 or more, I also keep the charity’s required written acknowledgment before I file or by my return’s due date, including extensions, whichever comes first.
Here’s my seven-step storage checklist:
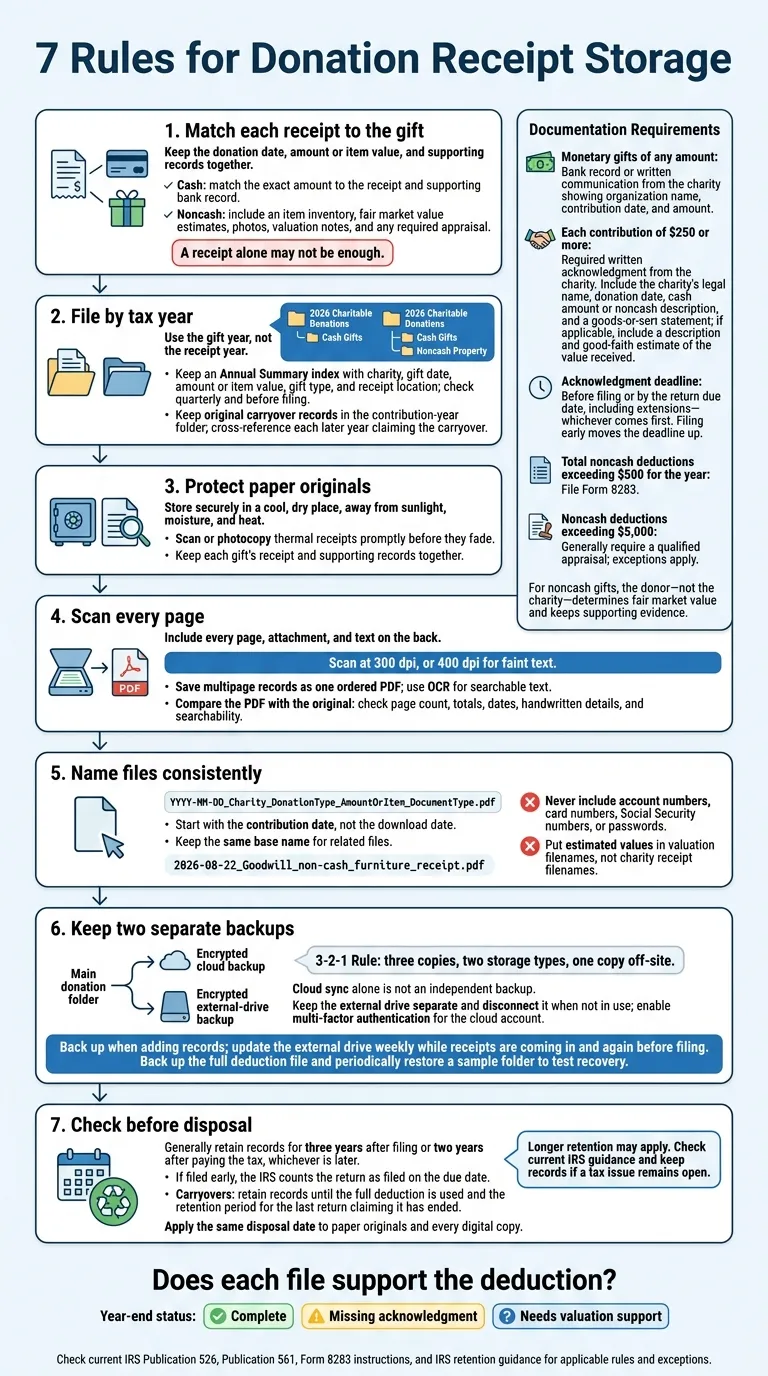
- Match each receipt to the gift: Include the donation date, amount or item value, and supporting records.
- File by tax year: Use the gift year, not the year the receipt arrived, and track any deduction carryovers.
- Protect paper originals: Store them somewhere secure, cool, and dry. Copy thermal receipts before they fade.
- Scan every page: Create searchable PDFs and check them against the originals.
- Name files consistently: Start with the donation date, then add the charity, gift type, and document type.
- Keep two separate backups: Use an encrypted cloud backup and an encrypted external drive, and test that files can be restored.
- Check before disposal: I generally keep records for three years after filing or two years after paying the tax, whichever is later, and longer when IRS rules require it.
My final check: Does each file support the deduction? Noncash gifts may need valuation records, Form 8283, or an appraisal - not just a receipt.
Which Donation Documents to Keep
Keep records that support each deduction. A receipt alone may not be enough.
For monetary gifts of any amount, keep a bank record or written communication from the charity that shows the organization’s name, contribution date, and amount. [1]
For each contribution of $250 or more, keep a written acknowledgment from the charity. It should include the charity’s legal name, donation date, cash amount or description of noncash items, and a statement about whether you received goods or services in return. If you did, the acknowledgment must describe them and include a good-faith estimate of their value. [1]
Get that acknowledgment before filing or by your return’s due date, including extensions - whichever comes first. Filing early moves your deadline up. An extension doesn’t let you wait until after you file. [1]
For noncash gifts, keep the charity’s description of the items and the records supporting your valuation. You - not the charity - determine fair market value. Save the evidence behind your estimate, not just the amount listed on the receipt. [1]
If your total noncash deductions exceed $500 for the year, file Form 8283 with your return. Noncash deductions exceeding $5,000 generally require a qualified appraisal, though exceptions apply. Check IRS Publication 526, Publication 561, and the Form 8283 instructions for current rules on acknowledgments, appraisals, and exceptions. [1][2]
File these records by year so they’re easy to find.
1. Link Receipts to Donation Dates and Values
Create one record per gift in each tax-year folder. Link the receipt, donation date, value, and backup files in that record. Follow the same process for cash and noncash gifts.
For cash gifts, match the exact dollar amount to the receipt and any supporting bank record. Record the donation date separately from the receipt date.
For noncash gifts, link the receipt to an item inventory, your fair market value estimate for each item, photos, valuation notes, and any appraisal.
Keep each deduction file complete so you can quickly trace the gift’s details when working on Form 8283.
2. File Donations by Tax Year
Once you’ve matched each receipt to a gift, file it under the correct tax year.
Create one paper folder and one digital folder for each tax year, labeled 2025 Charitable Donations, 2026 Charitable Donations, and so on. Keep Cash Gifts separate from Noncash Property, with each file organized for the year you claim the deduction.[6][7]
Use the gift year, not the receipt year.[4][10] For year-end donations, check the payment or delivery records before filing. A January bank posting or acknowledgment shouldn’t put the gift in the wrong tax-year folder.[4][5]
Add an Annual Summary index with the charity, gift date, amount or item value, gift type, and receipt location. Check it quarterly and before filing your taxes to spot missing records or gifts filed in the wrong folder.
If you carry a deduction forward, leave the original documents in the contribution-year folder. Add a cross-reference in each later-year folder showing the carryover claimed.[8][9] Keep paper originals in place; the next rule explains how to protect them.
3. Organize and Protect Paper Originals
Protect paper originals in a labeled tax-year folder, expanding file, or binder. Keep each gift’s receipt and supporting records together in chronological order. Add a short index that points to the matching digital file, but don’t cover the receipt itself.
Store paper files in a cool, dry, secure place, away from direct sunlight, moisture, and heat. Use a locked cabinet or fire-resistant safe, and keep digital copies too.[11]
Thermal-paper receipts need extra care. Scan or photocopy them promptly, then keep the originals in protective sleeves or envelopes.[5] Don’t fold them or put adhesive tape over the text.
4. Scan Every Page Into Searchable Files
Once you’ve protected the paper originals, create a searchable digital copy of each record in its matching tax-year folder.
Scan the whole record - not just the amount. Include every page, attachment, and any text on the back. Leave a small border to avoid cropping details. Keep the item list and valuation notes in the same scan as the receipt.
Scan receipts at 300 dpi, or 400 dpi for faint text. Save multipage records as a single PDF with the pages in order.[14][15] Use color when stamps, signatures, or handwriting matter.
Run OCR to make the PDF searchable by charity, date, amount, or item description. OCR should add searchable text without changing the original page image.
Compare the finished PDF with the paper original. Check page count, totals, dates, and handwritten details, then confirm that searches find the charity name and donation amount. Correct missed or misread text, and rescan any blurred or cropped pages.
Searchable files don’t replace required proof. For gifts of $250 or more, keep the charity’s contemporaneous written acknowledgment, including any goods-or-services statement on the back.[3] Save emailed acknowledgments with the same file when they contain the required details.
Give each scan a consistent file name so it’s easy to find.
5. Use Clear, Consistent File Names
Follow this pattern: YYYY-MM-DD_Charity_DonationType_AmountOrItem_DocumentType.pdf. Start with the contribution date, not the download date, so your files sort chronologically.
Use the charity’s exact name each time. Stick to plain labels like cash, non-cash, receipt, itemized-list, and valuation. Skip spaces, slashes, colons, and question marks. Use hyphens or underscores instead.[16][17]
Keep the same base name for related files. For example:
2026-08-22_Goodwill_non-cash_furniture_receipt.pdf
2026-08-22_Goodwill_non-cash_furniture_itemized-list.pdf
2026-08-22_Goodwill_non-cash_furniture_valuation_450.00.pdf
Put any estimated value in the valuation file’s name - not the charity receipt’s name.[13]
For two gifts to the same charity on the same day, add the receipt number to both filenames.[1] Never include account numbers, card numbers, Social Security numbers, or passwords in file names. Rename each file when you save it rather than leaving a vague name like scan001.pdf.
6. Keep Two Separate Digital Backups
After scanning and naming each receipt, copy the folder to separate backup locations. Keep one main donation folder and two encrypted backups: one in the cloud and one on an external drive. This follows CISA’s 3-2-1 rule: three copies, two storage types, and one copy off-site. Keep the external drive separate from your computer and disconnect it when you’re not using it.[21][23]
Cloud sync alone is not an independent backup. Neither are two copies stored in the same place.[22][23] Protect your cloud account with a strong password you don’t use elsewhere, and enable multi-factor authentication.[19][20]
Save the full deduction file, not just the receipt image. Your backed-up records need to support the deduction.[3][4]
Back up whenever you add records. Update the external drive weekly while receipts are coming in, and back up again before filing.[18][21] After each backup, open several files from both locations to check that they’re readable and complete.
Test recovery periodically by restoring a sample folder and opening its files. A successful backup message doesn’t prove you can recover your records.[12][23] Test restores before relying on either backup.
7. Follow IRS Record Retention Rules
Backups protect your files. IRS retention rules tell you when you can discard them. Keep each tax-year donation folder until its applicable retention period ends.
Generally, keep supporting records for three years after filing your return or two years after paying the tax, whichever is later. If you file early, the IRS counts your return as filed on the due date. Some situations require you to keep records longer; check the IRS retention guidance.
For carryover deductions, keep the records until you’ve used the full deduction and the retention period for the last return claiming it has ended.
Don’t delete or shred receipts, acknowledgments, appraisals, or Form 8283 before the applicable retention period ends. Use the same disposal date for paper originals and every digital copy.
Conclusion: Check Records Before Filing or Disposal
Before you file or discard anything, check that each donation file is complete.
At year-end, label each file complete, missing acknowledgment, or needs valuation support.
Before filing, make sure gifts of $250 or more have the required written acknowledgment by the earlier of your filing date or your return due date, including extensions.[4][3]
Before shredding or deleting records, check current IRS retention guidance. Keep records longer if a tax issue is still open.[24] Dispose of them only when the file is complete, the retention period has ended, and no issue remains open.
FAQs
Can I discard paper receipts after scanning them?
Yes. The IRS accepts scanned digital copies as valid tax documentation [1]. Before throwing away paper receipts, check that each scan is easy to read and includes the charity’s name, donation date, and description of the donated items [1].
Back up your digital copies in cloud storage or on an external drive. Prefer a mix of paper and digital records? Keep the paper copies in organized binders, too [1].
What if I lose a donation receipt?
Canceled checks, bank statements, or electronic fund transfer receipts may be enough if they clearly show the charity’s name, donation date, and amount.
For donations of $250 or more, though, the IRS requires a contemporaneous written acknowledgment from the charity. If you don’t have one, contact the charity promptly to request it.
Deductible.me helps prevent these documentation issues by securely storing digital receipts and itemized lists.
Do recurring donations need separate acknowledgments?
Yes. Each recurring contribution of $250 or more requires its own contemporaneous written acknowledgment from the charity to meet IRS requirements. For contributions under $250, keep consistent records, such as bank or credit card statements.
Save automated email receipts in a dedicated digital folder so each payment is documented and easy to find at tax time.